Adjusting the Carriage Rails on a Pilates Reformer
Optimize Your Reformer's Performance and Glide
Shop ReformersVital to the performance of your Pilates reformer is the proper alignment of the carriage rails. The carriage rails are what control the tracking of the carriage as it moves along the reformer.
In the worst case, improperly aligned carriage rails can lead to the carriage rubbing against the frame when performing exercises that place asymmetric load on the carriage, such as a side lunge.

But, even if the carriage is not so out of alignment that it rubs against the frame, there are still subtle issues that arise from an incorrectly aligned carriage. You may find that:
- Your carriage is only contacting one of the carriage stoppers.
- You may feel that the carriage has excess play from side-to-side, which makes the glide not as smooth as it could be.
- You may feel the carriage sticking or bumping at certain points along the carriage glide.
If you are experiencing any of these types of issues, read on for the exact cause and steps to adjust your reformer for the elimination of these issues.
Note that the following video includes detailed information on adjusting your reformer’s carriage rails: https://youtu.be/dUXXTKJOoTY
Adjusting the Carriage Rails
First, all the above issues are resolved by adjusting the carriage rails.

On Fortus Pilates reformers, as well as virtually all other reformers, you will find that the carriage rails are designed to be easily adjusted. Simply disconnect all springs and flip the carriage on its side to access the bolts securing the rail to the carriage:

Loosen, but do not remove, the bolts for the carriage rail and you will be able to move the carriage rail a few centimeters from side to side. This is the range of adjustment we’ll use to perfect our carriage glide. Note that you will usually want to adjust both carriage rails to roughly the same position to ensure the carriage stays centered after your adjustment.
The exact adjustment you’ll make depends on the type of issue you’re trying to resolve, of which there are two basic categories.
Issue 1: Rails Too Close Together or Too Far Apart
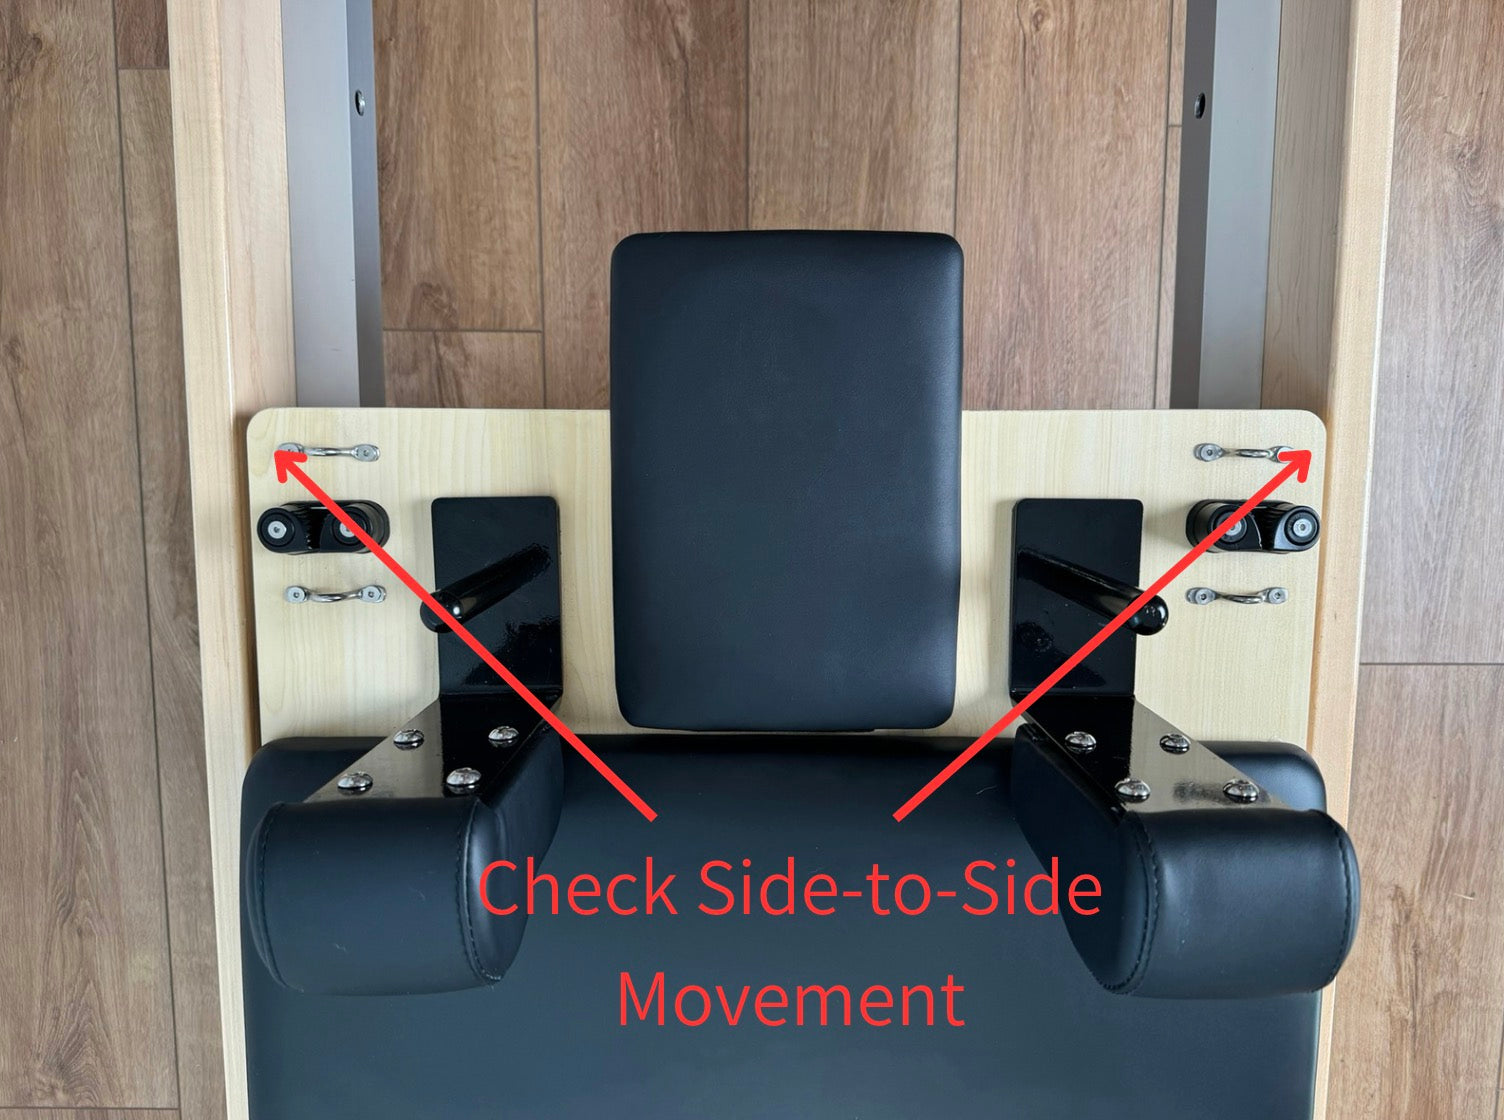
The most common issue we see is carriage rails that are adjusted too close together. This allows the carriage to sit too loosely in the frame. In such cases you will be able to significantly move the carriage from side-to-side when the carriage is sitting on the frame.

The solution to this common problem is to adjust the rails to be closer to the edge of the carriage i.e. further apart from one another. When the carriage is then placed back on the frame, the amount of side-to-side movement of the carriage will be reduced. Usually, this adjustment requires a bit of trial and error to get the adjustment correct.
The goal here is to have only a slight amount of side-to-side movement possible.
But caution: There can be too much of a good thing! If you adjust the carriage rails too far apart, they will be pressing against the frame with significant force during your carriage glide, which can lead to other issues and premature wear on the carriage rollers.
So, if after adjustment you can feel the carriage is tight in the frame and cannot be moved at all from side-to-side, repeat the process in reverse to slightly loosen the carriage by moving the rails closer together.
Issue 2: Rails not Parallel to Carriage
A second category of issues that can arise is when the carriage rails are not parallel to the carriage. In this case, the carriage will tend to sit crooked in the frame. A carriage that is more than slightly out of parallel can throw off many of exercises and create muscle imbalances.
The easy way to diagnose a carriage whose rails aren’t properly parallel is to simply connect one of the center springs and look at the carriage stoppers on each side of the carriage. What you want to see is that both carriage stoppers are in contact with the carriage. That is a parallel carriage.
However, if only one carriage stopper is in contact with a stopper, that indicates that the carriage rails are not parallel to the frame.

The solution is to simply make sure that, for each carriage rail, the front of the carriage rail is the same distance from the edge of the carriage as the back of the carriage rail. In other words, adjust the rails to be parallel to the carriage.
The easiest way to do this is to loosen the adjusting bolts and then use a measuring tape to ensure the distances are the same between the front and back; then tighten the bolts.
Conclusion
While the adjustments you make to the carriage rails are usually very small, they can have a big impact on your practice. When properly adjusted, your reformer should be a pleasure to use, with a perfectly smooth and quiet carriage glide regardless of the exercise performed.
For a video going through the adjustment of the carriage rails on a Fortus Pilates reformer, watch this video: https://youtu.be/dUXXTKJOoTY


